Phones call it portrait mode, photographers call it bokeh: a sharp person in front of a soft, blurry background. It hides a messy room, pulls attention to the face and makes an ordinary photo look professional. This guide shows how to blur the background of any photo for free, even one taken without portrait mode.
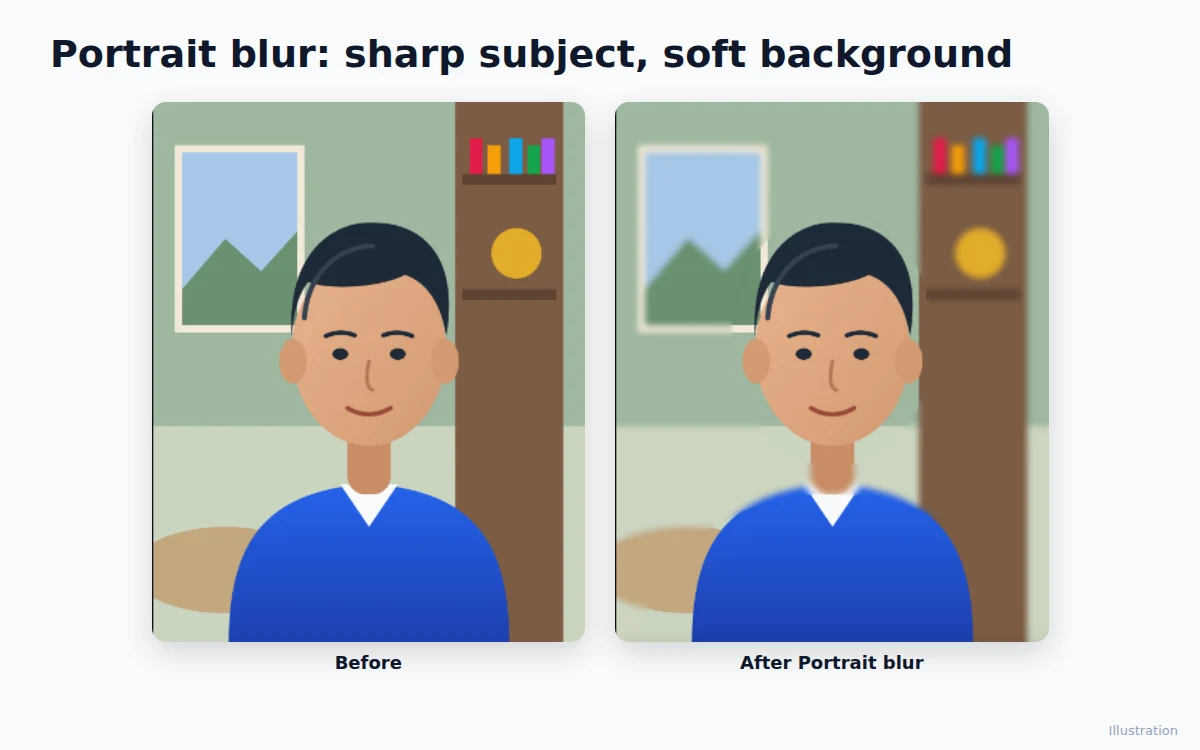
When a blurred background helps
- Profile pictures for LinkedIn, WhatsApp and Instagram, where the face should stand out.
- Product photos taken at home, where the room behind is distracting.
- Thumbnails and posters, where text sits over the background and needs to stay readable.
- Old photos taken without portrait mode.
Step 1: Open your photo
Open HF Photo Editor, click Open and choose your photo, or drag it onto the page. Click the photo to select it.
The best results come from photos where the person is clearly separate from the background: good light, a sharp face and some distance between them and the wall.
Step 2: Press Portrait blur (AI)
In the Properties panel, find Cut out and mask and press Portrait blur (AI).
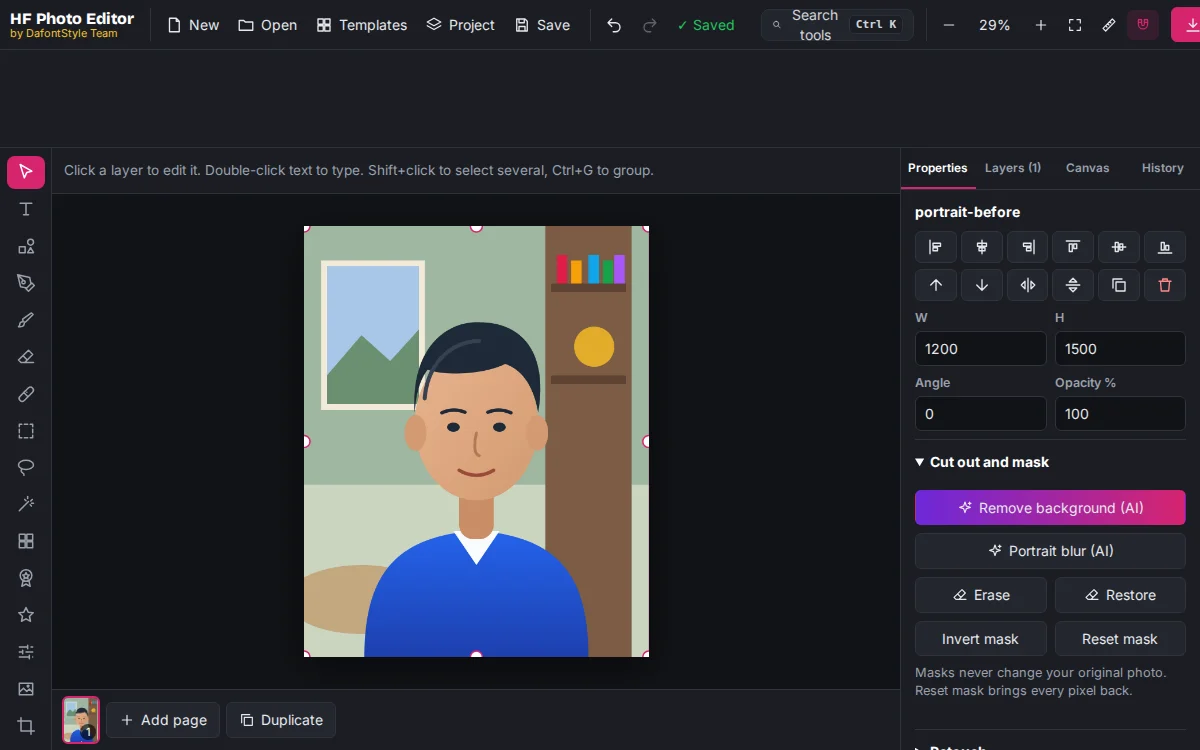
The first time, your browser downloads a small AI model, which takes a moment. It runs on your own device, so the photo is not uploaded anywhere. After a few seconds you have two layers:
- Your photo (subject): the person, cut out with a mask.
- Background (blurred): a blurred copy of the whole photo underneath.
Step 3: Choose how strong the blur is
Open Layers, click Background (blurred), and in Properties open Detail. Move the Blur slider:
- 5–10 for a natural look, like a phone's portrait mode.
- 14 (the default) for a clear, professional separation.
- 25 and above for a dreamy, studio-like backdrop.
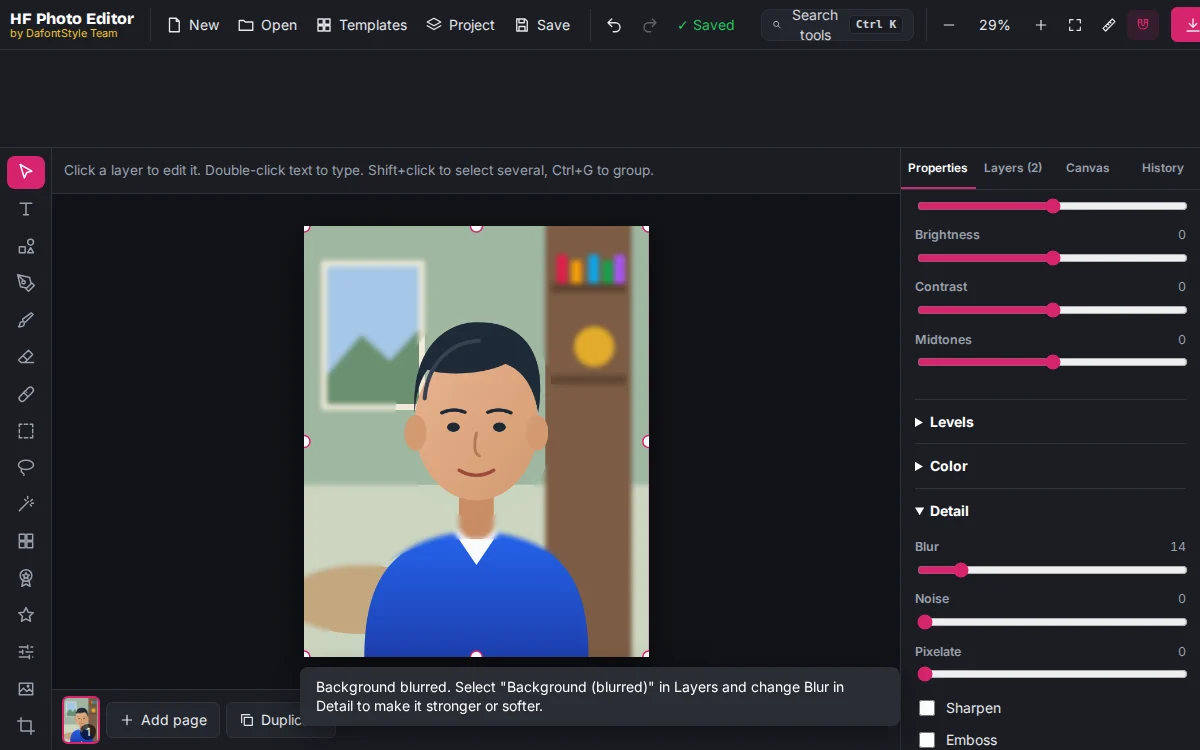
While the background layer is selected you can also darken it with Brightness, or lower Saturation so the person pops even more.
Step 4: Fix the edges
Hair, glasses and hands are the hardest parts. Select the subject layer and use the tools in Cut out and mask:
- Restore paints back parts of the person that look too soft.
- Erase removes leftovers of the sharp background around the edges.
Use a large, soft brush around hair. Nothing is lost: the mask never changes your original photo.
If you would rather have no background at all, a white backdrop or a new scene, our guide shows how to remove the background completely.
Step 5: Download
Click Download, choose JPG for photos, and keep the high-quality size the dialog picks. For a profile picture, use the size each network asks for.
Tips for a natural look
- Fix the light first. A dark or blue-tinted photo still looks dull after blurring; fix the light and colors first with one click.
- Don't overdo it. Very strong blur next to sharp hair can look fake. Start at 14 and adjust.
- Keep a little context. A soft but recognizable background (a café, an office) tells a story.
- Add text on the soft part. Headlines over a blurred background are easy to read, which is why it works so well when you design a YouTube thumbnail.